Showing posts with label lotd. Show all posts

Wednesday, December 24, 2014

Holiday Makeup Tutorial | Christmas Inspired Smokey Eye

Hello hello!

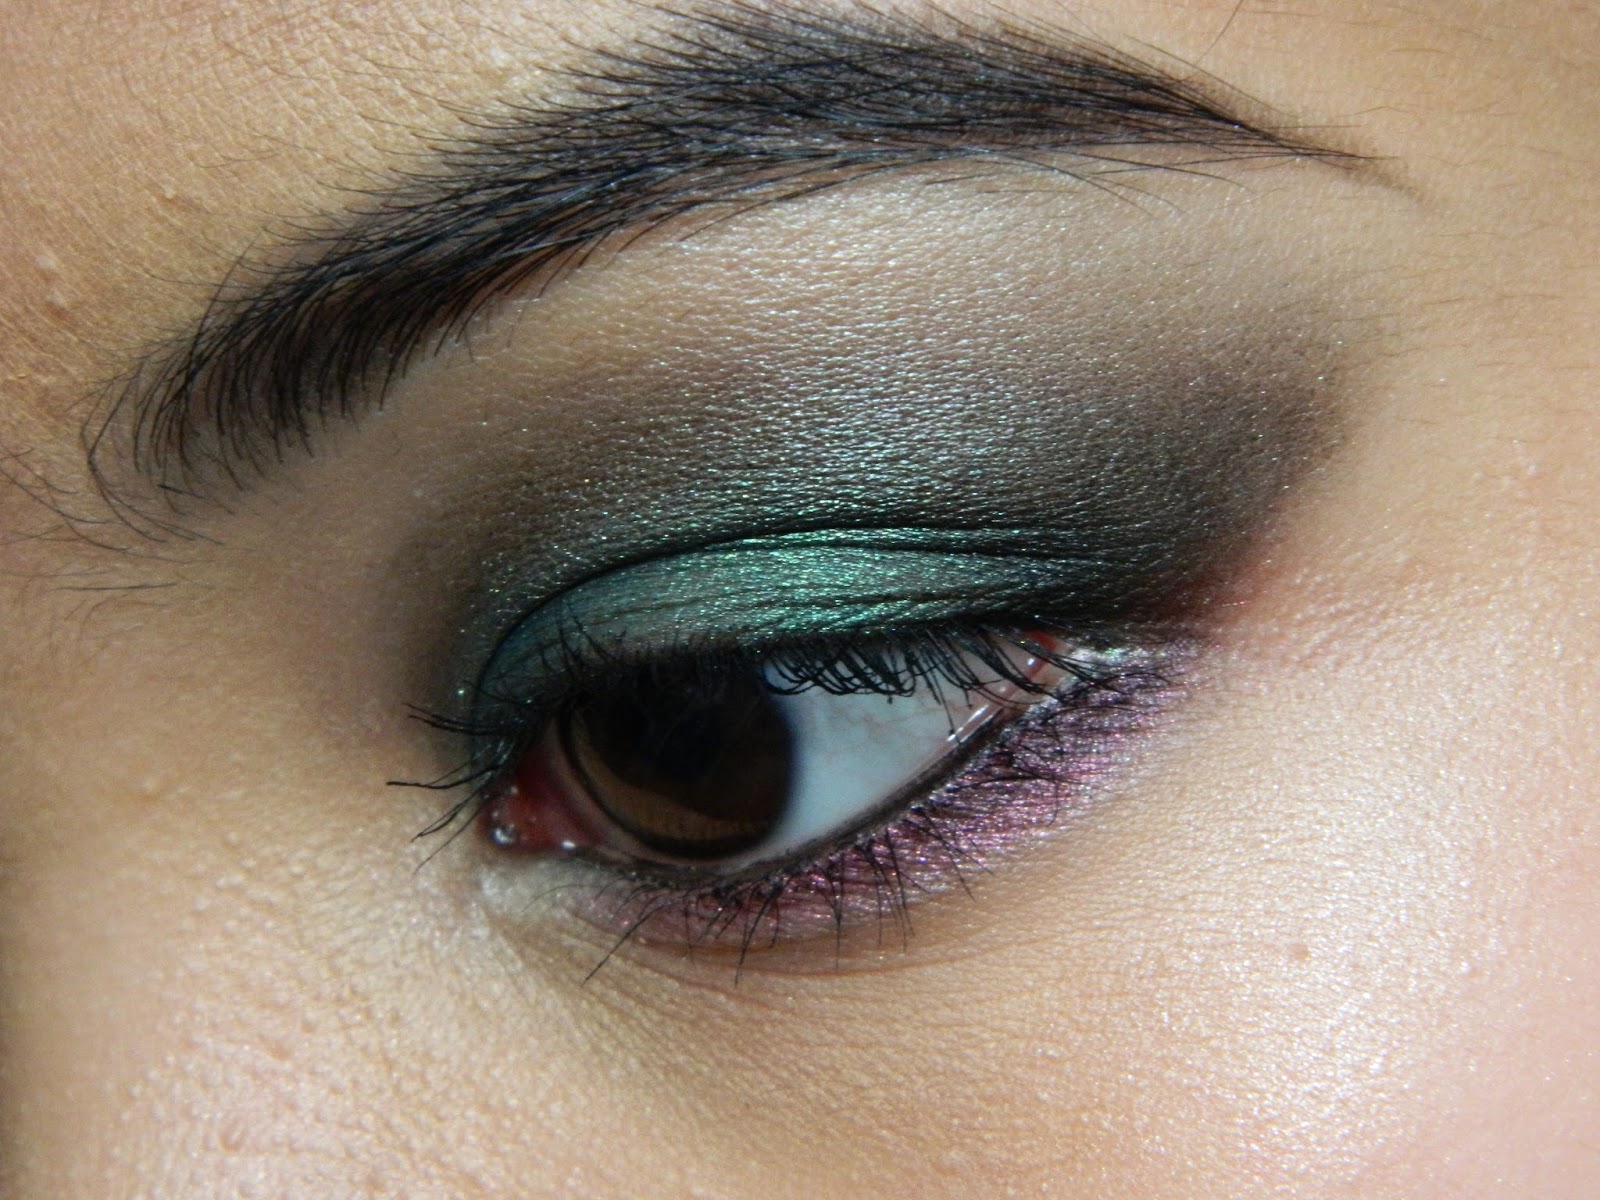
Today's makeup tutorial is on this Christmas inspired smokey eye. 

Here's the final look. 
 With a flat shader brush, I took the fourth green shadow from the top row of the LA Colors 16 colors 'Smokey' palette and patted it all over my pre-primed lids. 
TIP: Use the shadow wet to give the look a more metallic finish.  
TIP: If you know you're working with shadows with tons of fallout, do your eye makeup first then rub off any fallout from your face with a makeup remover wipe then work on your face makeup and brows.
Using the same flat shader brush, I took the brownish charcoal shade, the last shade from the top row, and placed this on and slightly above the crease. 
Using the Real Techniques Base Shadow brush, I took the black shade from the bottom row and used this to define the outer C and crease, blending upward and outward into to previous charcoal shade and towards the brow bone.
Using a flat shader brush, I took the magenta shade from the bottom row and used this to line one thirds of my bottom lash line and with the same brush, I took the black shadow and blended it onto the magenta shade while connecting the top shadows with the bottom shadows.

Using the Real Techniques Duo Fiber Eye Brush, I took Beige from the Lorac PRO 2 palette (you could also use the light cream shade next to the previous magenta shade) and highlighted my inner corner and brow bone. I finished off the eye look by lining my water line and tight line with black eyeliner and topping my lashes off with a good coat of mascara. 
Products used to complete this look:
Smashbox Photo Finish Primer, L'oreal True Match Mineral Powder Foundation, Benefit Hoola Bronzer, elf Pressed Blush in Wanderlust, Maybelline The Nudes Palette (black shadow for the brows), Maybelline Brow Drama in Deep Black, elf Eyelid Primer in Nude, LA Colors 16 Color Eyeshadow Palette in 'Smokey', Lorac PRO 2 Palette, Sephora 12Hour Jumbo Liner in Black, Smashbox Full Exposure Mascara, and Kat Von D Foiled love lipstick in Valentine.


Thanks for reading!


Happy Holidays!!~


-Mary

Friday, August 15, 2014

Maybelline The Nudes Palette | Smokey Eye Makeup Tutorial

Hello hello!

Today, I will be sharing something a little different...
I'll be doing a makeup tutorial on this black and gold smokey eye for you guys using only the new Maybelline The Nudes eyeshadow palette. And yes, I know...a smokey eye using The Nudes palette and not The Smokes palette...

Also keep in mind, I'm still experimenting with the lighting and I'm still learning to work with this camera so my tutorials aren't 'top quality' and are not the best...but I'm trying.

Here's the final eyeshadow look using only the Maybelline The Nudes Palette

With my lids already primed with the e.l.f. eyelid primer, I applied these two shades on my crease, with the lighter shade blending more upwards towards the browbone and the darker brown shade focusing more on the outer V and crease while still slightly blending upwards into the lighter shade. For this, I used the Real Techniques duo-fiber eyebrush and base shadow brush.

Using the RT base shadow brush, I gently blended this black eyeshadow right over the darker brown shade from the previous step, this gives the black shade a less harsh look when being blended and smoked out into the lighter shades.

Using the RT accent brush, I took an e.l.f. Smudge Pot in 'Gotta Glow' and placed it on the moving part of the lid, focusing on the inner half of the lid and lightly blending it outward, I also blended this on the inner corner and the inner third of the lower lash line to match the top.
With a slightly larger brush that has the same shape as the RT accent brush (an unbranded brush), I set that e.l.f. Smudge Pot with the light gold shade from the palette. Using the e.l.f. Smudge Pot underneath makes the gold eyeshadow more vibrant. 


Using the same unbranded brush we used with the gold eyeshadow in the previous step, I mixed these two dark brown and bronze eyeshadows to blend out and reduce the harshness of the light gold eyeshadow.
I then used both the the RT duo-fiber eye brush and the base shadow brush and blended more of the black eyeshadow into the crease, blending into the dark brown and bronze eyeshadows  from the previous step and with the rest of the black eyeshadow we placed earlier.
Make sure you have the same exact order of eyeshadows for the bottom lash line...have the light gold in the inner corner and lash line, the dark brown and bronze in the middle, and the black in the outer corner, connecting with the top eyeshadows.
Finally, I lined my eyes with the e.l.f. Black Cream Eyeliner and slightly winged it out.
From here you could curl you eyelashes and add a good lengthening and volumizing mascara and you'd be done with this look.
This is optional, but to add more drama to this smokey eye, I added a pair of false lashes from eBay and went over the glue with this Love & Beauty Black Liquid eyeliner.
For the rest of the look, I used the e.l.f. Mineral face Primer, L'oreal True Match Mineral Powder Foundation in 'Natural Beige W4-5/464', Smashbox Photo Set Pressed Powder in 'Dark' (for bronzer), Smashbox 'Hint of Bronze' Blush (for bronzer), Tarte Amazonian Clay Blush in 'Flush', e.l.f. Studio Blush in 'Pink Passion', Milani Bella Gel Powder Eyeshadow in '28-Bella Chiffon' (for an all over highlighter), e.l.f. Eyelid Primer in 'Nude', false lashes from eBay,  eos lipblam, and a Revlon lipstick in 'Black Cherry'.


I hope you enjoyed this tutorial!

Thanks for reading!

-Mary